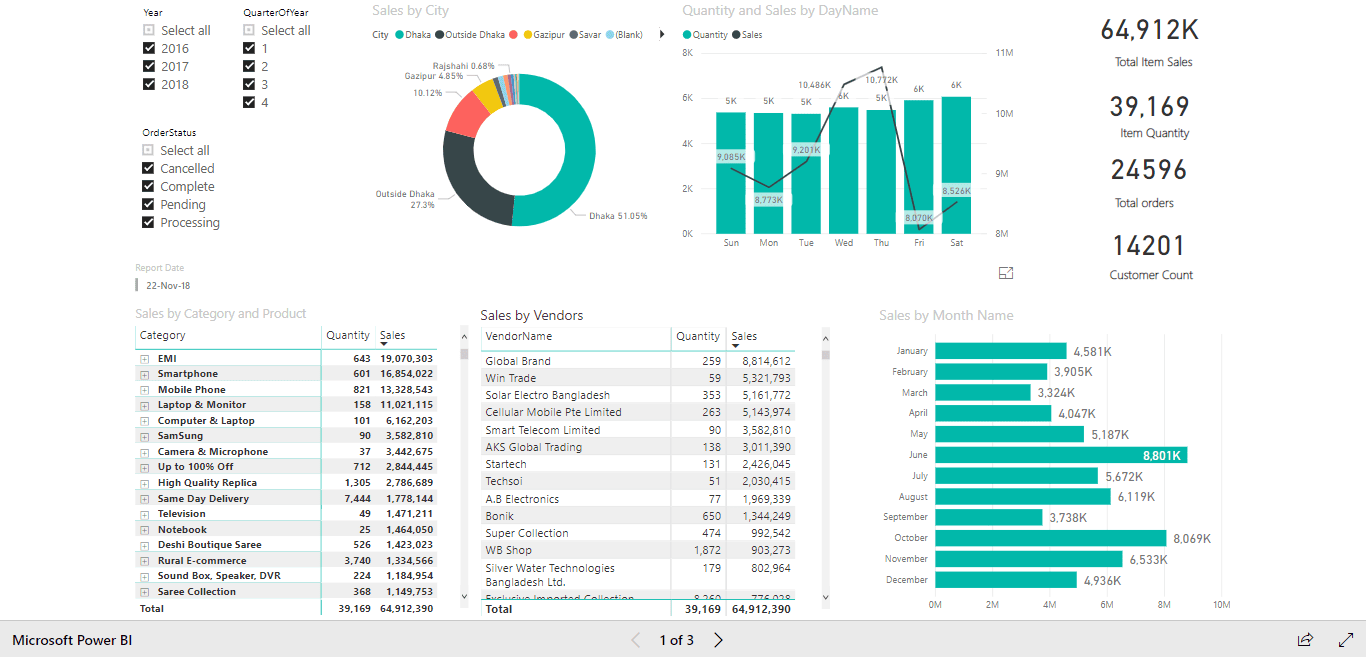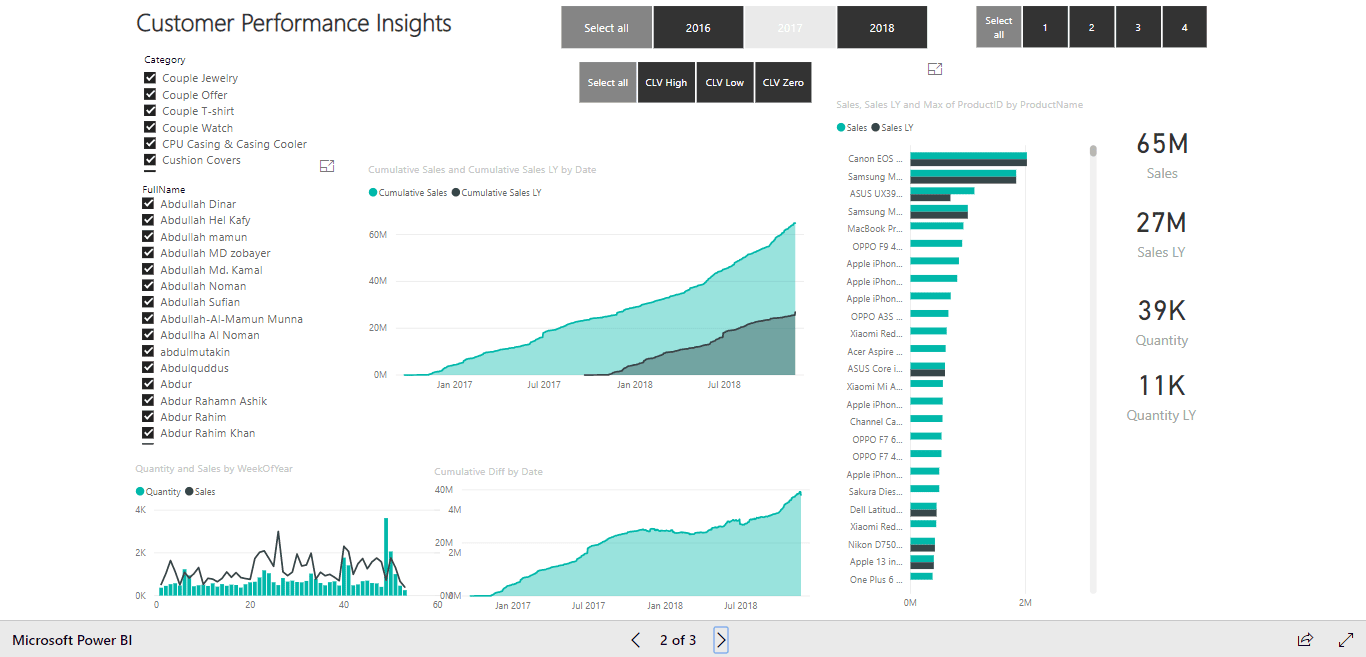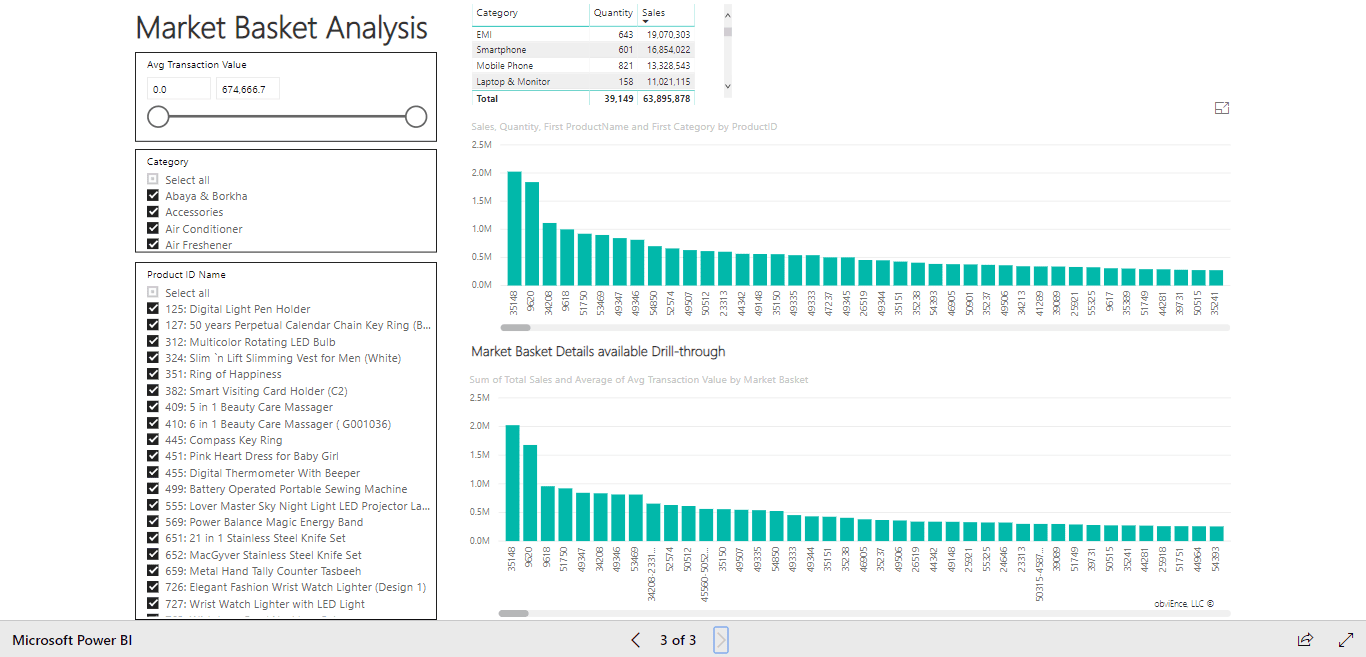
This is the case study of integration Microsoft Power BI with a nopCommerce store. Below you will find the description of the integration process itself and the results in 8 months after implementation.
The case study is provided by Nafiz Khan Khadem from nopStation, a concern of Brain Station 23, the company that made this integration for one of their clients.
The challenge: Why integrate nopCommerce with Power BI
One of the nopStation clients, the CEO of an eCommerce company, asked if he can get the business insight at a glance in a single dashboard to make more quick and informed decisions regarding his business.
The information he needed could be gathered separately by merging different reports from the nopCommerce Admin panel but it was more time consuming and manual. So nopStation decided to integrate Microsoft Power BI with that nopCommerce store and made a dashboard according to the CEO’s requirements.
As you can learn from the official site, Power BI is a business analytics solution that can connect the data from hundreds of sources and turn it into meaningful reports. Since nopCommerce and Power BI both use Microsoft technologies, the handshaking between these two platforms is pretty good and easy to achieve.
The integration process
Some common dimensions that were used:
|
Some common facts that were used:
|
The steps required to connect Power BI with nopCommerce
- Configure Power BI Gateway.
- Create a new Power BI account.
- Download and install Power BI on-premises (recommended) data gateway.
- Login with Power BI email and password and register a new gateway.
- Create a new Data source from nopCommerce for BI.
- Create Data Source for BI (dimension and fact tables or views of those tables).
- This data source can be in the same nopCommerce database or any different one.
- Download and install Power BI Desktop.
- Create a PBIX file and connect it with the Data source.
- Create the reports according to requirements.
- Publish
- Create a new Data source from nopCommerce for BI through a plugin (Alternate to point #2).
- Install plugin
- Register a Native type application of that Power BI account.
- Collect application id.
- Save application id into plugin configuration.
- Publish via plugin
- Setup a sync schedule on the BI account.
Output Sample


The results of integration: benefits for the client
Once the integration is done, the store owner does not need to do anything to create a new BI report on the dashboard. All data synchronization is automatic and synchronization processes are running in the off-peak hours. So, site speed and database are not hampered either.
The client can now get the updated reports on quantity and sales from the more fast and dynamic dashboard reports. He can make decisions on which products are demanding and to manage inventory easily with the information about Cost vs Sales per category and product. Using the BI dashboard, the client saves much time as he does not need to create an excel report like before to make business decisions.
As per the client’s last month report, their sales growth has increased by 13% after using Power BI in 8 months.
Recently in nopCommerce blog was published the post about the integration of nopCommerce with MS Dynamics NAVConnector to provide easy inventory management. More case studies and success stories are available in this section.