
Introduction
In today's fast-paced digital world, it has become increasingly important for businesses to have an online presence. ECommerce platforms like nopCommerce have made it easier for businesses to sell their products and services online.
nopCommerce, an open-source eCommerce platform built on the ASP.NET Core framework, is a popular choice among developers due to its flexibility and scalability. However, developing and maintaining an eCommerce platform can be a complex task, especially when dealing with multiple stores.
The nopCommerce multi-store setup feature allows you to effectively manage multiple online shops through a single installation. With this feature, you can tailor products, categories, prices, languages, payment and shipping options, and other features to each store. This functionality is particularly advantageous for those who want to sell different items or services through separate storefronts.
Within the nopCommerce administration panel, you can maintain separate store records for each store and customize each store's settings for multi-store management. Moreover, you can choose a unique theme, design, or color scheme to provide each store with a distinct appearance and atmosphere.
Visual Studio 2022 is a popular integrated development environment (IDE) used by developers to create, test, and deploy software applications. In this tutorial, we will explore how to configure a multi-store development environment in Visual Studio 2022 using nopCommerce 4.60.
This tutorial assumes that you have basic knowledge of Visual Studio, C#, and ASP.NET MVC. It is intended for developers who want to create and manage multiple stores in nopCommerce.
Outline
By following the steps outlined in this guide, developers can streamline their workflow, reduce errors and conflicts, and ultimately accelerate the development process. Whether you're a seasoned nopCommerce developer or just getting started, this guide will provide you with the knowledge and tools needed to create a robust and efficient development environment.
We will cover the following topics in this tutorial:
- Setting up the development environment
- Creating multiple stores in nopCommerce
- Configuring multiple stores in Visual Studio 2022
- Testing and debugging multiple stores
- Deploying multiple stores to a production environment
By the end of this tutorial, you will have a clear understanding of how to configure a multi-store development environment in Visual Studio 2022 using nopCommerce 4.60. This will enable you to develop and maintain multiple eCommerce stores efficiently and effectively.
Prerequisites
- System requirements: Before installing nopCommerce and Visual Studio 2022, make sure that your computer meets the minimum system requirements. You can find the system requirements for developing with nopCommerce.
- Installation of nopCommerce: You need to install nopCommerce 4.60 on your local computer. You can follow the installation instructions provided in the nopCommerce documentation.
Additionally, you should also have a basic understanding of the nopCommerce eCommerce platform, including how it works, how to create stores, and how to manage products and orders. You can learn more about nopCommerce from their official documentation.
Setting up the development environment
Please make sure that the system requirements are fulfilled as mentioned in the prerequisites section of this article.
Go to the nopCommerce download page and click on the Download button under the Package with the source code title as shown in the image below.
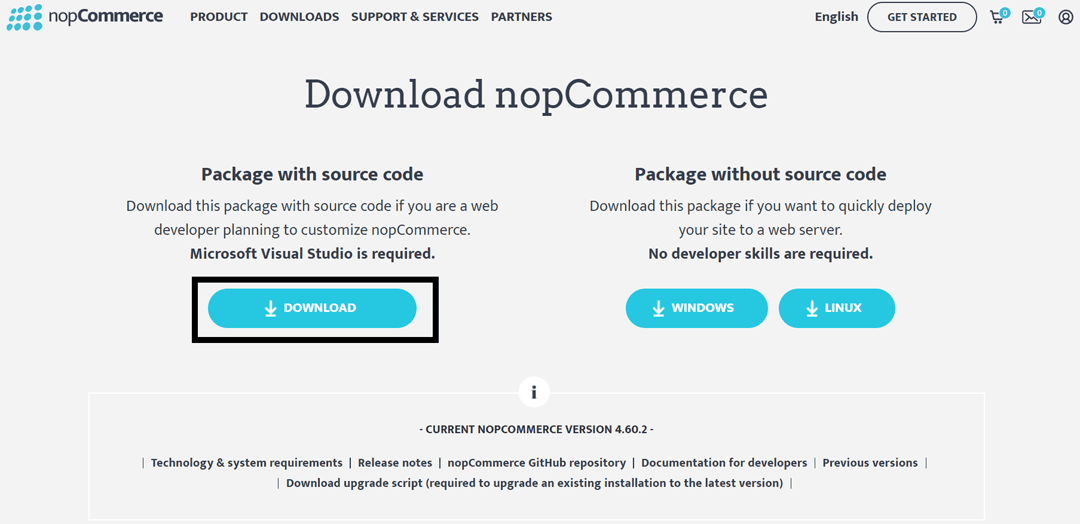
This will start downloading the nopCommerce source code zip file if you are a logged-in user otherwise you’ll have to register on the nopCommerce website and then download the file as mentioned above in this step.
Once the download is completed, please follow the instructions mentioned in the Installation of nopCommerce section of this document or you can directly start installing the nopCommerce in your local development environment if you’re already familiar with the nopCommerce installation using Microsoft Visual Studio 2022.
Creating multiple stores in nopCommerce
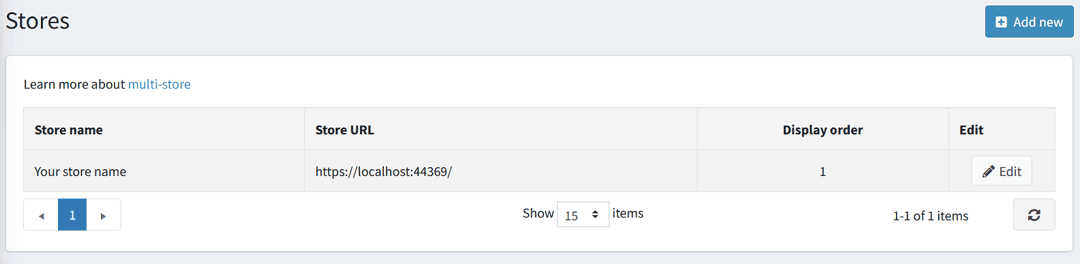
Assuming that nopCommerce has been successfully installed and is running in your local browser on a URL similar to https://localhost:44369/. The next step is to access the Admin panel and navigate to the Configuration > Stores menu in the nopCommerce admin panel.
You should see the Store configuration screen similar to the image below.
Step 1
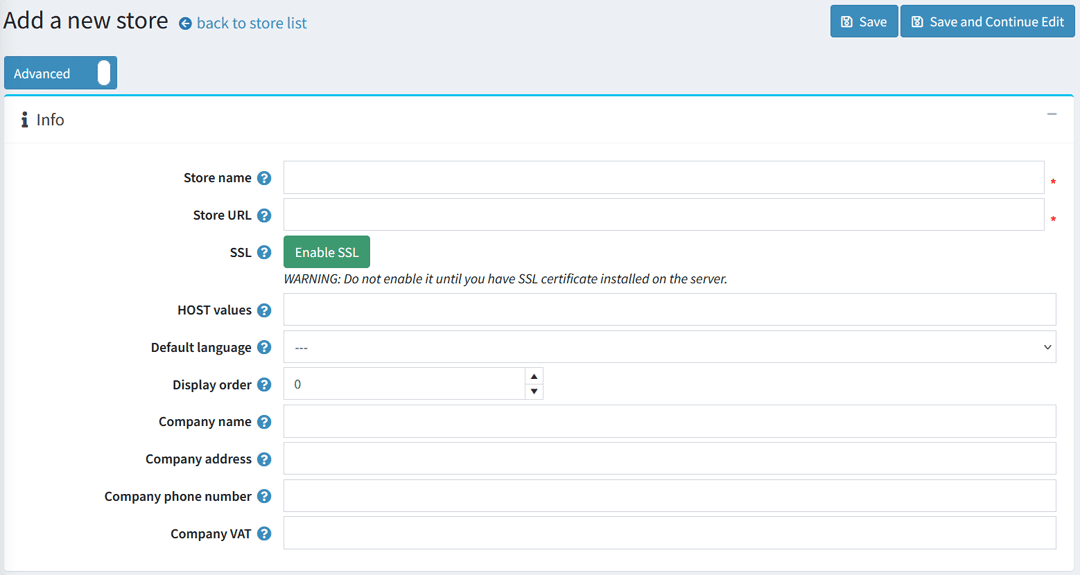
Click on the Add new button on this store configuration screen and you’ll be redirected to the Add a new store page as shown below.
Step 2
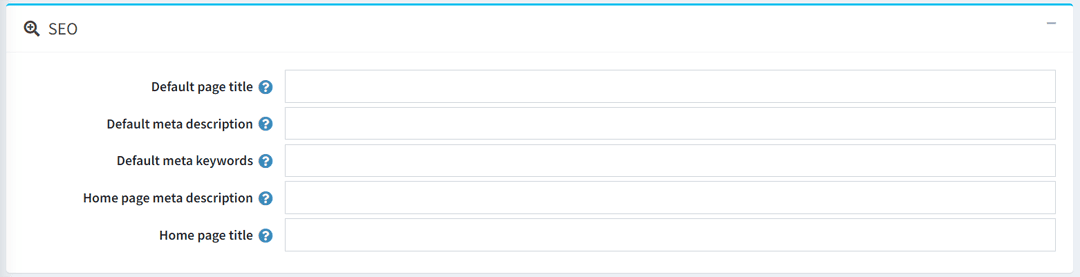
Make sure to provide values for the Store name, Store URL, Enable SSL, HOST values, etc. and also provide values for the Default page title and Home page title under the SEO panel on the Add a new store page as shown in the image below.
In our case, we are using port 44369 for the first store so I’m using 44370 for the second store.
You can also check the multi-store configuration in the nopCommerce documentation for a more clear description of setting up other stores in your nopCommerce installation.
Once done, click on the Save button to save the new store configuration.
To confirm that the store setup was successful, go to Configuration > Settings > General settings and find the dropdown for multi-store configuration located at the top of the page.
Step 3
In this step, we will bind the URL of the newly created store from the above two steps in the applicationhost.config file so you could run the project on two different URLs from the same Visual Studio instance.
To do this, navigate to the project directory and locate the hidden folder named .vs within the parent directory of your project directory. Please see the image below for your reference.
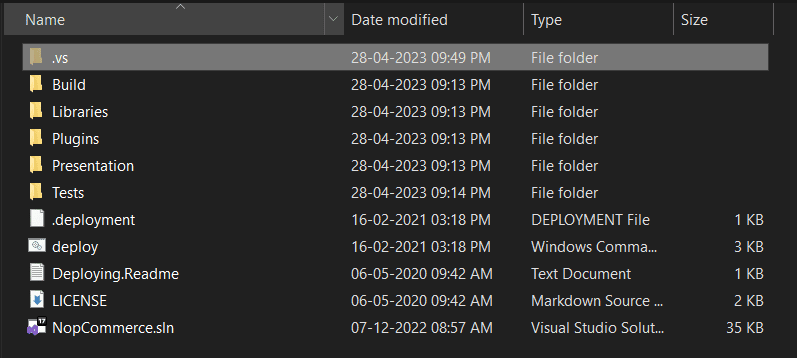
In the .vs directory, locate the applicationhost.config file under the .vs\NopCommerce\config folder as shown below.

Use any text editor of your choice or use Microsoft Visual Studio to open and edit the applicationhost.config and navigate to the
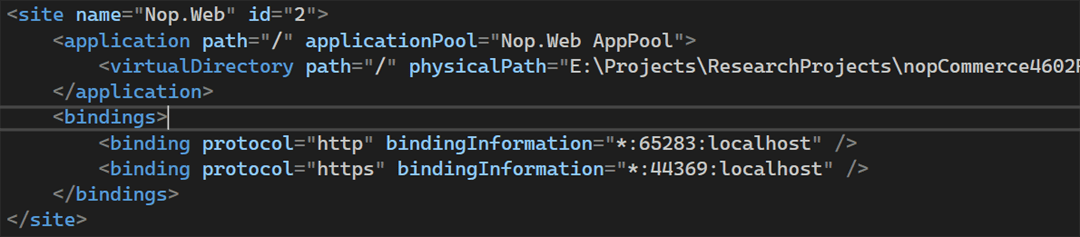
In the bindings section, duplicate the HTTPS binding if you are running your project in HTTPS otherwise duplicate the HTTP binding if you are running your project in HTTP.
Since we are using port 44370 in our case for HTTPS binding, we’ll duplicate the HTTPS binding and change the port accordingly as shown below.
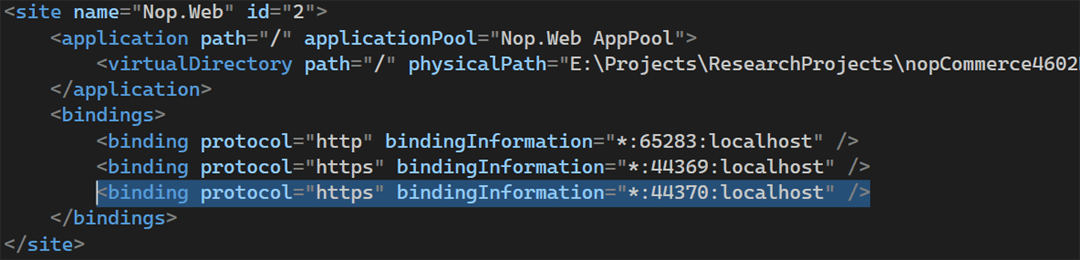
Once done, save the file and restart the project in Microsoft Visual Studio 2022.
Step 4
All set! Your nopCommerce project is almost ready with multi-store configuration in your Microsoft Visual Studio development environment.
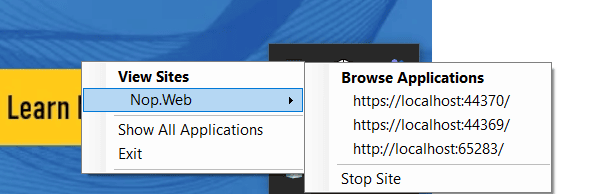
In this example, we are using IIS Express to run the application.
The application will run by default on the first port in the HTTPS binding entry and then you can try running the application using the second URL (On the second port) manually or using IIS Express as shown in the image below.
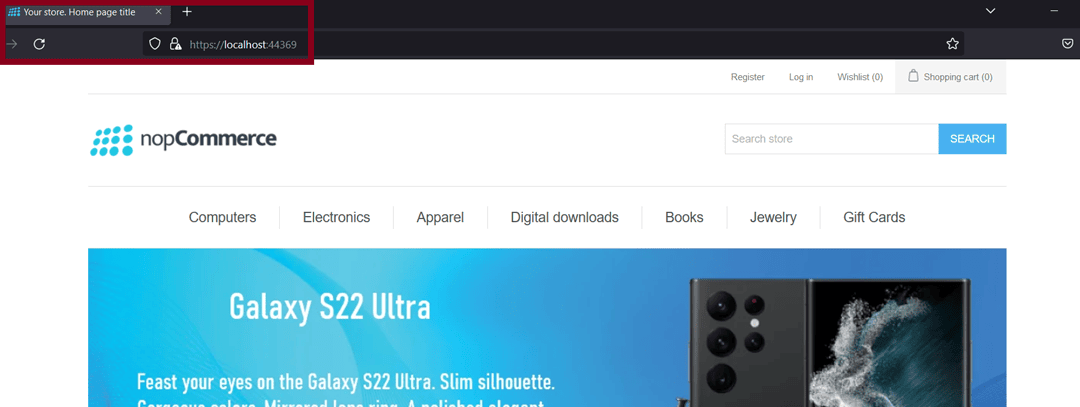
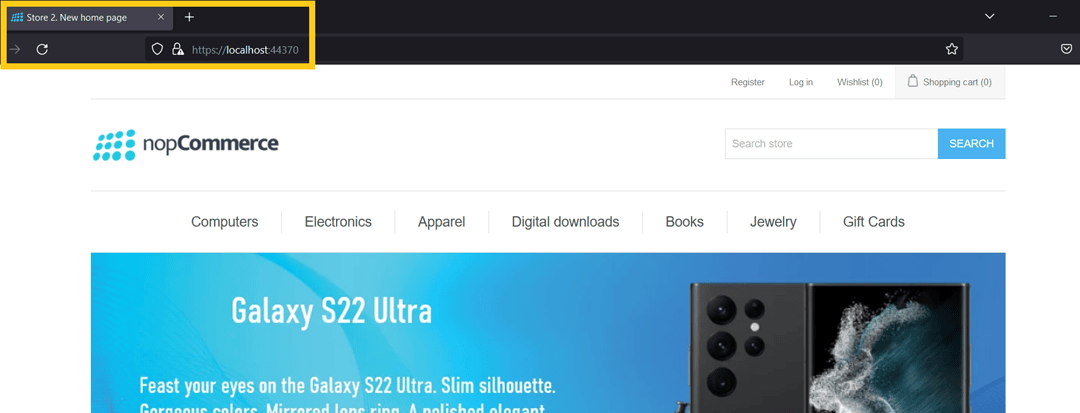
Exciting news! The multiple stores in your project have been successfully set up. You can now view both stores to confirm that they have been installed successfully. Please refer to the image below for a visual representation of how your stores should appear.
Store 1
Store 2
Wrapping up
To sum up, as a developer, configuring a nopCommerce multi-store in Visual Studio may seem daunting initially, but with the proper guidance and resources, it can be achieved with ease. By diligently adhering to the instructions and verifying that all required configurations are in order, you can successfully install multiple stores. This will not only enhance the user experience for your customers but also optimize your operations and boost your revenue.
This post was written by nopAdvance, a nopCommerce Gold Solution Partner. Their company specializes in theme development, plugin development, performance enhancement, nopCommerce customization, third-party service integrations, B2B and B2C websites using nopCommerce, etc.
Comments